

Discover the true costs of building a small business website in 2026. Learn budget-friendly options to get online professionally.
Geo Targeting Google Ads: A Setup Guide for Local Advertisers
Geo targeting controls where your Google Ads actually show up, and getting it right is the fastest way to stop paying for clicks outside your service area. Set your campaign’s location to the specific areas that produce conversions, then tighten it further with radius rules and exclusions once you have data. That single change often does more for your cost per lead than any bid strategy tweak.
Here’s your immediate checklist before you touch anything else in the account:
- Open Campaign > Settings > Locations and confirm your location match type (Presence vs. Presence or Interest).
- Always pair a ZIP code with its state or country when entering it manually, for example “94103, California.”
- Click the map preview after saving to visually confirm the shaded area matches your actual service zone.
Google’s own documentation on targeting ads to geographic locations confirms that narrowing to relevant regions, cities, or radii improves return on ad spend by cutting waste from irrelevant clicks. That’s the whole game here: precision over volume.
Table of Contents
Table of Contents
- What Is Geo Targeting and What Types Does Google Ads Support?
- How Do You Set Up Location Targeting in Google Ads?
- Presence vs. Presence or Interest: Which Should You Use?
- Radius Targeting and ZIP Code Nuances You Need to Know
- How Do You Optimize a Geo-Targeted Campaign Over Time?
- Why Aren’t My Ads Showing in Certain Locations?
- What Does a Real Local Setup Checklist Look Like?
- Where Can You Verify These Google Ads Location Rules?
- What the Data Actually Tells You About Geo Targeting
- Get Local Geo Targeting Set Up Right the First Time
- Sources
- FAQ
What Is Geo Targeting and What Types Does Google Ads Support?
Geo targeting (sometimes called location targeting) is the Google Ads setting that determines which geographic areas your ads are eligible to appear in. It works alongside “locations of interest,” a separate signal Google uses to catch searchers who are researching a place even if they’re not physically there, like someone in Denver googling “plumber in Boulder” before a move.
Google Ads gives you several target types to choose from, and you can layer them:
- Country or state: broad targeting for national or regional brands.
- City or metro area: the most common choice for local service businesses.
- Postal code (ZIP): tighter than a city, useful for businesses with defined service boundaries.
- Radius (proximity) targeting: a circle drawn around an address, ideal when your service area doesn’t follow ZIP or city lines.
- Location groups: Business Profile locations, places of interest, or custom groups uploaded in bulk.
Availability of some target types (particularly location groups and certain places of interest) varies by market, so double-check what’s offered before building a campaign around a specific type. The Google Ads Help documentation on geographic targeting lists the current options for your account’s market.
How Do You Set Up Location Targeting in Google Ads?
Setting up geo targeting correctly takes about ten minutes if you follow the sequence in order and verify each step before moving to the next.
- Navigate to Campaign Settings. Go to Campaigns, select your campaign, click Settings, then expand Locations.
- Choose “Enter another location.” Type a city, region, ZIP code, or address, then select “Radius” if you want a proximity target instead of a fixed boundary.
- Format ZIP codes correctly. Always include the state or country, since “94103” alone can return the wrong match; “94103, California” resolves correctly every time.
- Set your radius in miles or kilometers. Google lets you draw a circle from a specific address, useful for home service businesses without clean ZIP boundaries.
- Bulk upload if targeting many areas. You can add up to 1,000 location targets at once, but review the map preview afterward since bulk uploads occasionally misfire on ambiguous place names.
- Save, then reopen the settings tab. Confirm the locations actually persisted. This sounds trivial, but it’s the single most common setup mistake we see: a save that silently reverts because of a formatting error.
- Use the Ad Preview and Diagnosis tool, not a live search. Searching your own ads from your desk skews your account’s impression data and won’t reflect what someone in a different ZIP actually sees.
Pro Tip: Never trust a single glance at the map preview. Zoom in to street level around your service boundary, especially in metro areas where a ZIP code can straddle two counties, one of which you might not actually serve.
Presence vs. Presence or Interest: Which Should You Use?
This one setting quietly wastes more ad budget than almost anything else in a Google Ads account, and most advertisers never touch it.
Google Ads gives you two positive-matching options. Presence or Interest shows your ad to anyone physically in your target area, plus anyone searching for or showing interest in that area, even from somewhere else. Presence restricts delivery to people actually located in or regularly in your target area. According to Google’s own guidance on advanced location options, Presence or Interest is the default and recommended setting for most campaigns, but Presence is the better choice when you need only users physically in the target area.
For a plumber, HVAC company, or pest control business, Presence is usually the correct call: you don’t want to pay for a click from someone three states away who’s merely researching a move. For travel, real estate, or event businesses, Presence or Interest often makes more sense, since a chunk of your best leads are people planning a future trip or relocation.
Exclusions compound this decision. If you exclude a neighboring city to avoid overlap with a franchise partner, double-check the excluded boundary doesn’t accidentally carve out a pocket of your own service area, a mistake that happens more often than you’d think when ZIP boundaries and city lines don’t align cleanly.
Radius Targeting and ZIP Code Nuances You Need to Know
Radius targeting draws a circle around a specific address rather than following administrative boundaries, which makes it the better fit for service businesses whose coverage doesn’t match ZIP or city lines. A landscaper who drives 12 miles from a central shop location fits a radius model far better than a jagged ZIP boundary ever could.
But radius and ZIP targeting both run into the same wall eventually: privacy thresholds.
- Google enforces minimum privacy thresholds on location targets, including radius and postal code targeting, so a target area with too few users may show ads inconsistently or get disallowed outright.
- Rural ZIP codes and very small radii are the most common casualties of this rule.
- Always format U.S. ZIPs with the state attached: “94103, California” resolves correctly, while a bare five-digit number can match ambiguously or fail.
If a ZIP won’t target, don’t fight it. Broaden to the surrounding city or county, cluster two or three adjacent ZIP codes together, or switch to a radius target centered on your business address and layer exclusions around it afterward. This workaround solves the vast majority of “why can’t I target this ZIP” support tickets.
How Do You Optimize a Geo-Targeted Campaign Over Time?
Geo targeting isn’t a set-once setting. It’s a starting hypothesis you test and refine with real conversion data.
- Start narrow and resist early bid changes. Give a new location setup two to four weeks before making major bid adjustments, since early data is too thin to act on reliably.
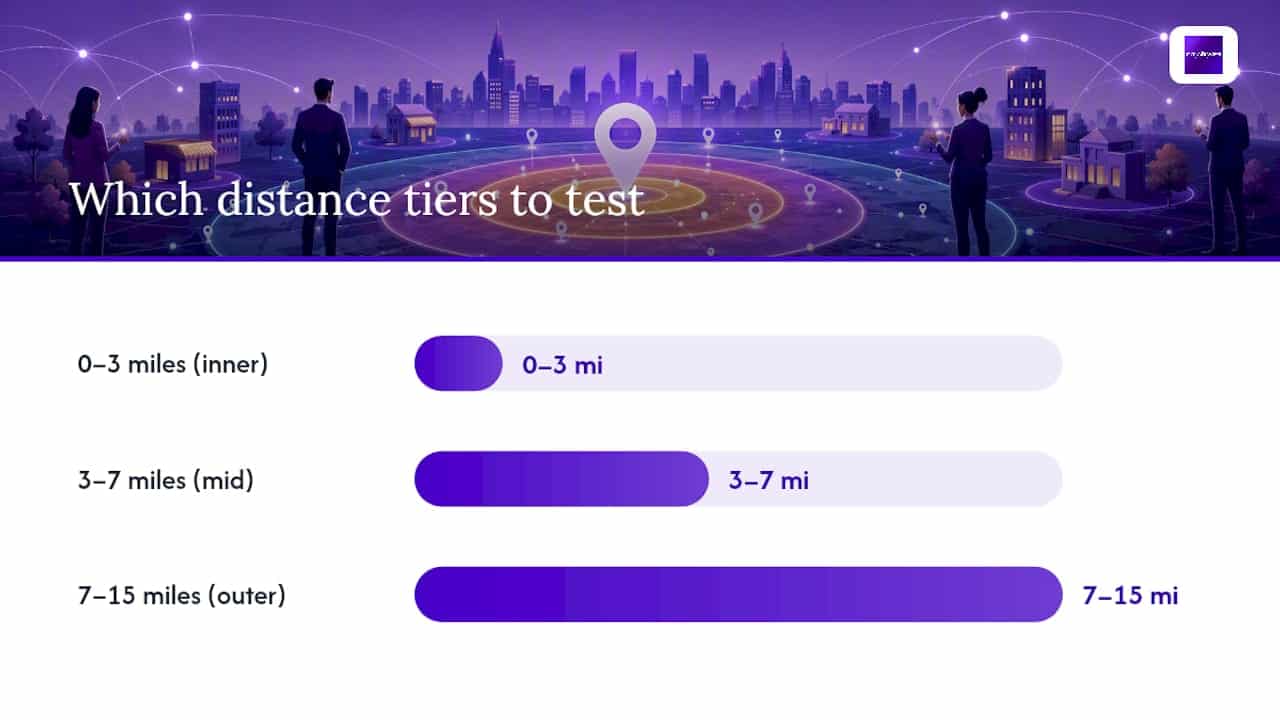
- Break your service area into distance tiers. Testing something like 0 to 3 miles, 3 to 7 miles, and 7 to 15 miles from your business address helps you find where cost per acquisition actually holds up, a method outlined in radius targeting guidance for Google Ads that most advertisers skip entirely.
- Set bid adjustments once you see a pattern. If the outer distance tier converts substantially lower than the inner ring, a negative bid adjustment on that zone is a reasonable starting point.
- Match your ad copy and landing page to the geography. A headline mentioning the specific city or neighborhood consistently outperforms generic copy in local campaigns, and it costs nothing extra to write.
- Read the Locations report under Campaigns, not just the summary dashboard. This is where you actually see performance by city, region, or radius tier, and where slow zones reveal themselves.
Pro Tip: Don’t wait for a “clean” 30-day cycle to make decisions. If one distance tier has zero conversions after 4 weeks and a meaningful spend, cut it. Waiting for statistical perfection on a small local budget just burns more money proving what you already suspected.
More depth on this, including how to layer bid modifiers with time-of-day targeting, is in our guide to local PPC strategies for maximizing ad spend.
Why Aren’t My Ads Showing in Certain Locations?
Start with the basics before assuming something is broken. Check these in order:
- Confirm your location match type. Presence vs. Presence or Interest changes eligibility more than advertisers expect.
- Check for accidental exclusions. A negative location layered on top of a positive target can quietly zero out a whole neighborhood.
- Verify the ZIP or radius isn’t hitting a privacy threshold. Small or rural areas sometimes get restricted without an obvious error message.
- Run the Ad Preview and Diagnosis tool for the specific location in question rather than a manual search.
- Pull the Locations performance report to see whether impressions are simply low, not zero.
Because Google’s location matching relies on device signals, user settings, and behavior, a small percentage of mismatches is expected and not a sign your account is broken. If the report shows real impressions but no conversions in a target area, that’s a bidding or creative problem, not a targeting problem. If none of this resolves it, that’s the point to escalate to Google Support or bring in someone who manages PPC accounts for a living.
What Does a Real Local Setup Checklist Look Like?
City Web Company runs the same sequence on nearly every local account we set up: audit the existing location settings first, then build campaign-level locations before ever touching ad-group-level locations of interest.
- Audit the account for existing (often outdated) location targets.
- Set campaign-level locations to match the actual service area.
- Add ad-group-level locations of interest only if you’re running multiple service zones with different messaging.
- Layer radius or ZIP targeting where boundaries don’t align with the business’s real coverage.
- Add exclusions for areas outside the service radius or covered by a partner location.
- Write local ad copy referencing the specific city or neighborhood.
- Align the landing page content with the geography in the ad.
- Confirm conversion tracking is firing correctly before scaling budget.
One account we restructured had been running Presence or Interest targeting across an entire metro area for over a year, despite the business only serving a 15 mile radius. Switching to Presence targeting with a tightened radius and distance-tiered bid adjustments cut wasted spend and let the budget concentrate on the zones that were actually converting.
Our full walkthrough on step by step Google Ads setup for local lead generation covers this checklist in more depth, including conversion tracking setup.
Geo targeting works because it lets you concentrate ad spend on the areas your business can realistically serve, and Presence matching prevents budget leakage to interested-but-unreachable searchers.
| Point | Details |
|---|---|
| Match type decision | Use Presence for strict local services; use Presence or Interest for travel, real estate, or event businesses. |
| ZIP formatting | Always pair a ZIP code with its state or country, like “94103, California,” to avoid mismatches. |
| Privacy thresholds | Small or rural ZIPs and tight radii can fail minimum area or user thresholds and stop showing ads. |
| Test before scaling | Give a new location setup two to four weeks of data before making major bid adjustments. |
| Agency support | City Web Company builds campaign-level and radius-based location targeting into every local Google Ads setup it manages. |
Where Can You Verify These Google Ads Location Rules?
For the official rules straight from Google, these are the pages worth bookmarking:
- Target ads to geographic locations: the core setup reference for all target types and bulk upload limits.
- About advanced location options: the definitive explanation of Presence vs. Presence or Interest.
- Location targeting overview: explains how Google determines location signals and their accuracy limits.
- Location targeting via the Google Ads API: for developers managing geo-targets programmatically.
What the Data Actually Tells You About Geo Targeting
Most advice on geo targeting treats it like a one-time setup task: pick a radius, save it, move on. That’s backward. The advertisers who get the most out of location targeting treat it the way you’d treat keyword bidding, as an ongoing optimization loop with real data behind every decision, not a checkbox you clear during initial campaign build.


The conventional wisdom oversells radius targeting and undersells the match-type decision. Plenty of local businesses spend months fiddling with radius size while leaving Presence or Interest turned on by default, which is often the bigger leak. A pest control company doesn’t need clicks from someone three states away browsing “pest control” content out of curiosity. That’s Presence or Interest doing exactly what it’s designed to do, just not what that business needs.
If you take one thing from this guide, prioritize the match-type setting before you touch radius size or exclusions. Get that wrong and no amount of radius tuning fixes the underlying waste. Get it right, and the rest of the optimization work becomes a matter of degree, not damage control.
Get Local Geo Targeting Set Up Right the First Time
Reading the setup steps is one thing. Auditing an existing account that’s been bleeding budget to Presence or Interest targeting for a year, then rebuilding it with distance tiers and localized creative, is a different kind of work entirely. That’s the gap City Web Company fills for local service businesses that don’t have the bandwidth to run this as an ongoing testing loop.

City Web Company manages Google Ads location targeting the way this guide describes it: campaign-level setup first, radius and exclusion refinement second, and a conversion tracking check before any budget scales up. If your account has been running on default settings since launch, there’s a good chance you’re paying for clicks outside your real service area right now. Get a look at how Google Ads management from City Web Company handles this for local businesses, and request an account audit to see where your current geo targeting is leaking spend.
Sources
- Target ads to geographic locations – Google Ads Help
- About advanced location options – Google Ads Help
- Location targeting – Google Ads Help
FAQ
Can Google Ads Be Geo-Targeted?
Yes. Google Ads supports targeting by country, region, city, postal code, radius around an address, or custom location groups, and you can layer multiple types within one campaign, as detailed in Google’s targeting documentation.
What’s the Difference Between Presence and Presence or Interest Targeting?
Presence shows ads only to people physically located in your target area, while Presence or Interest also includes people elsewhere who are searching for or showing interest in that location; Presence or Interest is Google’s default recommended setting.
What Is an Example of Geo Targeting?
A plumber in a specific metro area setting a 15 mile radius target around their shop address, combined with Presence matching, is a common example: it shows ads only to people physically within that service zone.
Is $20 a Day Good for Google Ads?
It depends entirely on your industry, competition, and cost per click; a tightly geo-targeted local campaign can make a modest daily budget stretch further because it eliminates wasted impressions outside your service area, but a small daily budget is often thin for most competitive local service categories once clicks are priced in.
Why Isn’t My Business Showing Up for a Specific ZIP Code?
The ZIP may fail a minimum privacy threshold for area size or user count, or it may be formatted incorrectly without the state attached; broadening to the surrounding city or using radius targeting instead usually resolves it, per Google’s location targeting guidance.
Recommended
- Step by Step Google Ads Setup for Local Lead Generation
- How to Optimize Google Ads for Better Local Leads
- Google Ads for Local Businesses: The Ultimate Guide to Getting More Customers – City Web Company | Digital Marketing Agency
- How to Advertise Locally on Google: A Complete Guide for Businesses – City Web Company | Digital Marketing Agency
These articles were popular with other readers too: